Marker Art Tips For Coloring Glowing Hands
Fellow marker slingers, hello and welcome to the blog. This week's commission work brings us Danny Rand better known as Iron Fist. Writer Roy Thomas and Artist Gil Kane created Iron Fist during the pop culture phenomenon of martial arts in the mid 1970s. I’m sure you remember that song “Everybody is Kung Fu Fighting”, well yeah Kung Fu was a big deal during those days and Iron Fist was Marvel’s answer to the craze. Hi-Yah!
Ok, so here’s the background in a nutshell. Danny lost his parents on an expedition to the mystical city of K’un-L’un and blames their death on Harold Meachum (His father’s business partner). After being saved from a pack of wolves the city guards of K’un-L’un take Danny to see their ruler Yu-Ti. When Danny expresses his desire for vengeance, Yu-Ti apprentices him to Lei Kung, The Thunderer, who teaches him martial arts.
Danny remains in the city for 10 years leveling up his Kung Fu grip proving to be one of Lei Kung’s most gifted students. Danny is eventually given the chance to attain the power of the Iron Fist by defeating the dragon Shou-Lao the Undying and guardian of the molten heart that had been torn from his body. In the heat of battle Danny throws him self against the dragons scar which burn a tattoo of a black dragon on his chest. Once Danny kills the dragon he advances into its lair and plunges his fists into the brazier containing the dragons molten heart emerging with the power of the Iron Fist. Incase you’re asking yourself what the hell a brazier is, it’s a metal container for holding live coals usually used to heat a room. Look at that always learning something new in this blog.
If you’re a fan of Netflix’s Daredevil or Jessica Jones you most likely already know that there are also plans for a separate Iron Fist and Luke Cage series to show up on your Netflix feed soon. Eventually all four characters will join forces culminating in a Defenders Series which I cannot wait for.
Congratulations you’ve passed Iron Fist 101 now lets talk markers and how I create glow/energy effects with them.
First let’s get a little scientific with it.
Most things that emanate light are usually brightest at its core and the hotter the light the brighter the core.
Let’s keep this in mind as you start to plan the temperature of your glow/energy effect. Next you’ll want to figure out the material encasing this energy if any. The encasing material will dictate how light reacts with the surface of said material.
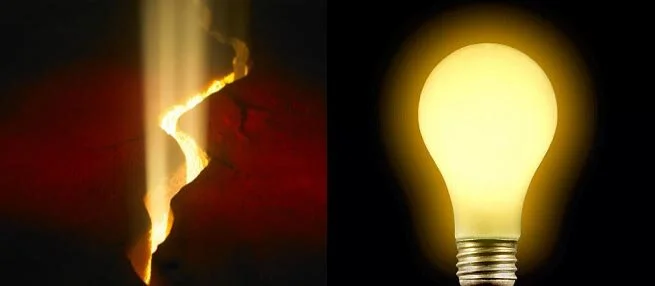
For example light or glow emanating from cracks in a rock or stone formation will react different then light radiating from a glass light bulb. In the case of the rock formation the glow will only radiate through cracks and create a directional glow with heavy dark areas where the surface is solid on the other hand glow from a light bulb radiates freely with no limitations or shadows within the actual object and fades as it travels away from the bulb. These are two examples on opposite ends of the gamut but most things fall somewhere in between.
Let’s sling some ink.
Now that I’ve got you thinking like Bill Nye the Science Guy let us use markers to emulate the glow. In the case of this Iron Fist I could have gone the usual direction of the ultra white glowing fists that most often mean minimal definition within the hand.
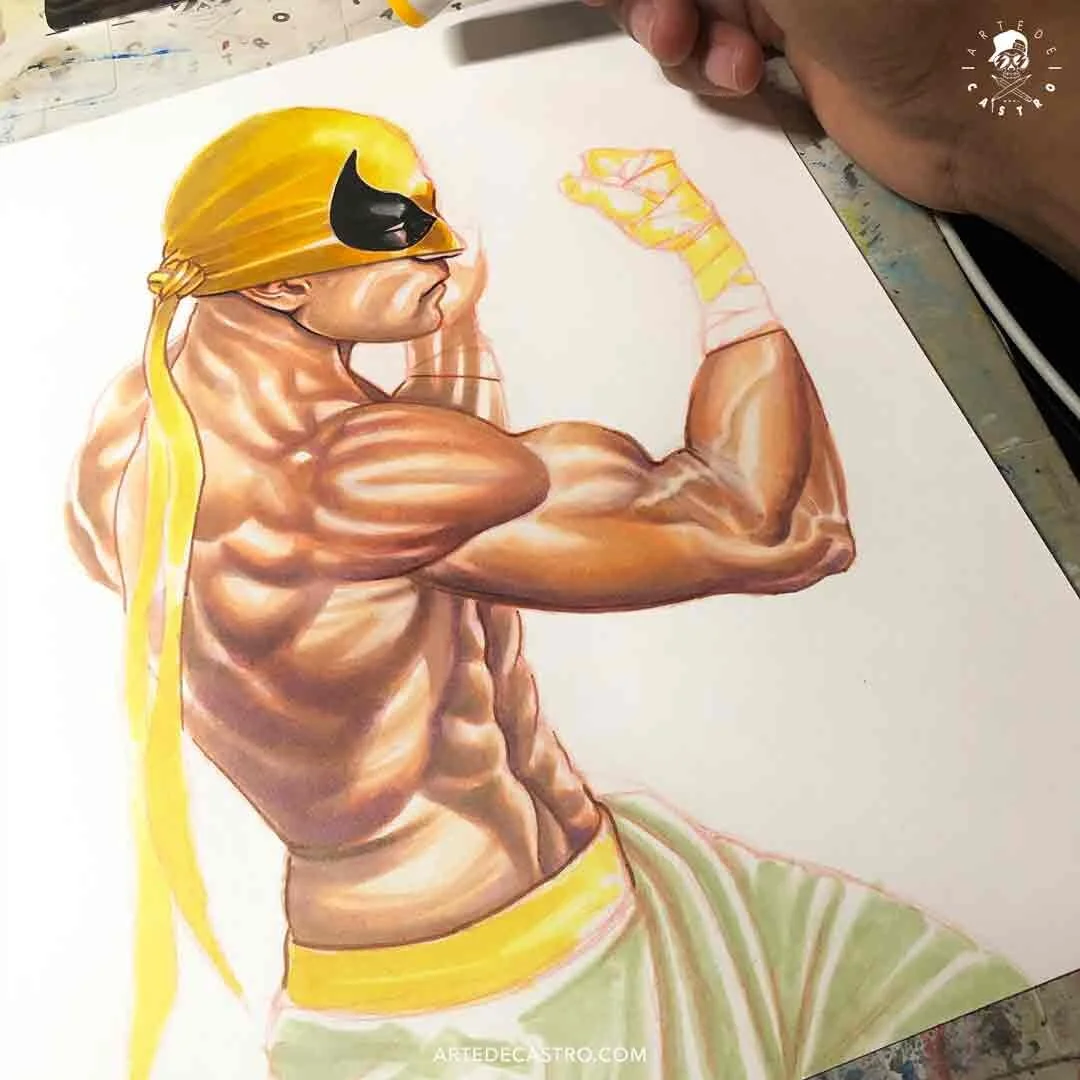
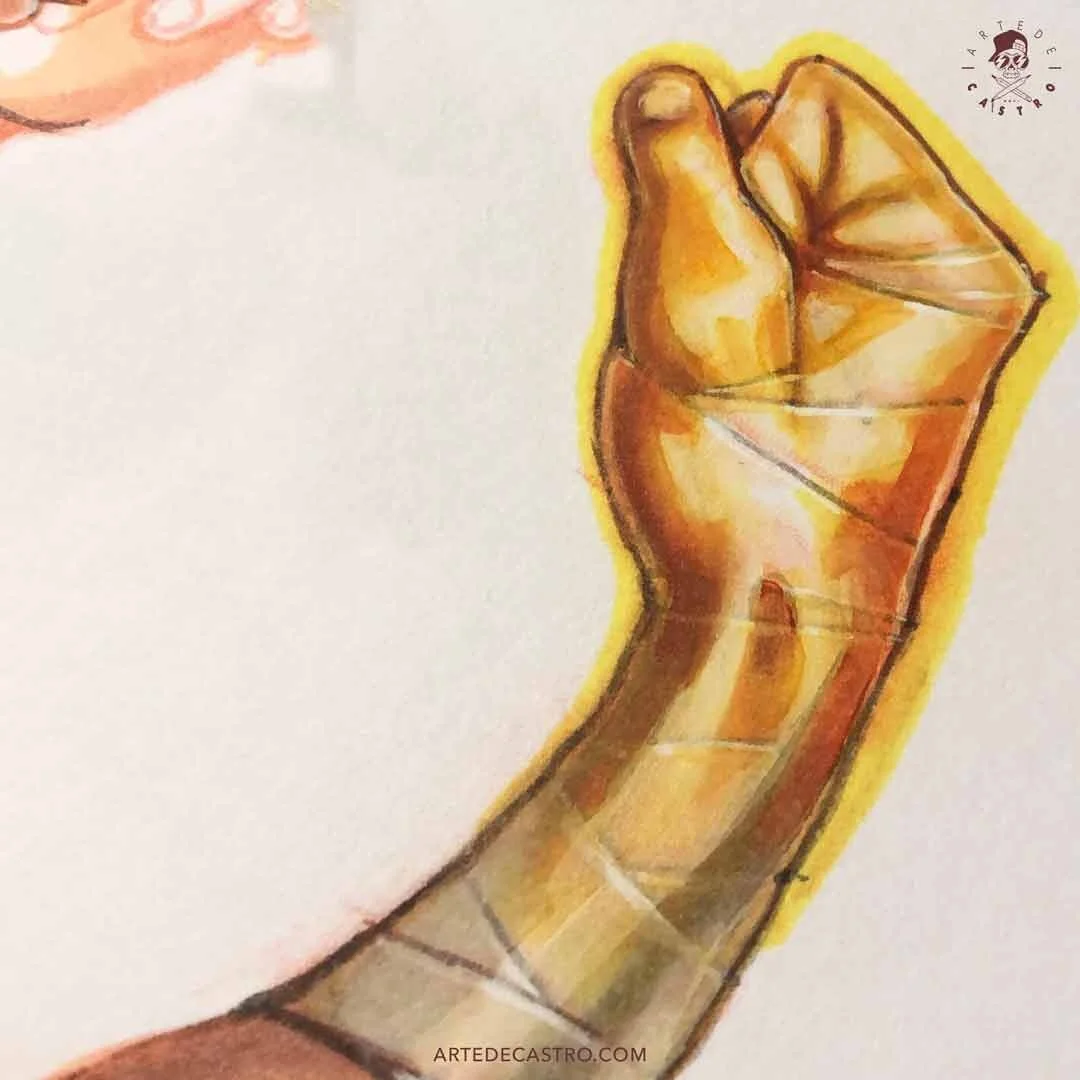
Instead I decided to cool the temperature down so that I could include more muscle definition around the core of the hands as a cooler temperature would mean a less intense light. I did this by laying down some light reds and yellows to form the muscle structure of the hands.
Next, I began to darken the areas where I felt the muscle is at its meatiest/thickest with warm grays and dark reds making sure to also leave lots of white in between indicating the areas where light is most likely to radiate. Creating these dark areas helps to establish form and give volume to the object encasing the glow or energy.
“I’m not just an ordinary fighter, okay? I’m the Iron Fist.”
The outer glow.
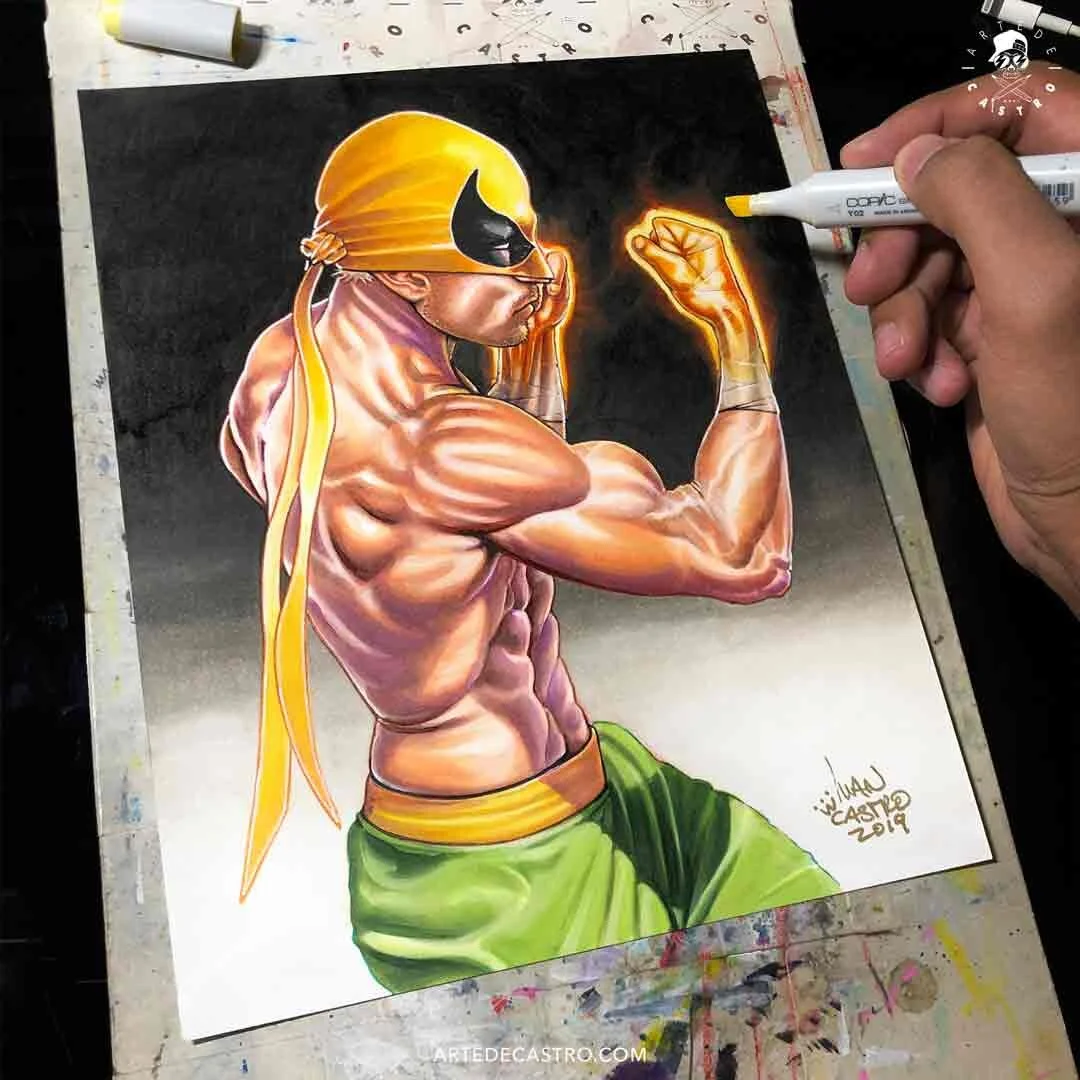
Let’s turn our attention to the outer glow area now. I created a sort of white blob like shape around the hands with a light outer layer of yellow. The outer yellow layer will turn into the fading light as it travels away from the core of the hands. I used an almost white yellow, a slightly darker yellow and a reddish orange to create a gradient from light to dark to blend the yellow out of the white outline around the arm. This pretty much created my glow. Next I darkened the grey around the glow to make the glow brighter and used an orange color to lightly blend the glow into the dark grey.
Once I was happy with the hands, the glow and how it faded into the dark grey I went back with a white paint marker and brightened up all the areas where I felt the glow should be at its brightest to turn up the intensity of the light. There are no exact methods to create energy and glows but think these basic steps should get your started and heading in the right direction.
Thanks for reading.
If you want to know which brands of markers and the color codes and names I used to create these affects feel free to ask below. Be sure to leave your Instagram account in the comment so I can check out your work or tag me at @artedecastro incase you try out these methods. I would love to see what you guys do with these tips.
Your neighborhood marker slinger,
Ivan Castro


